A previous post described my new favorite tool for creating paper beads. The next step is to seal the beads with some kind of protective varnish. I tried 3 different sealants.
Method 1: ModPodge
The first thing I tried was painting each bead with 2 coats of ModPodge, mostly because it was just sitting there on my worktable. One of the trickiest parts was figuring out how to dry the beads. Thinking I was being clever, I stuck the pins in an old cardboard salt cylinder.
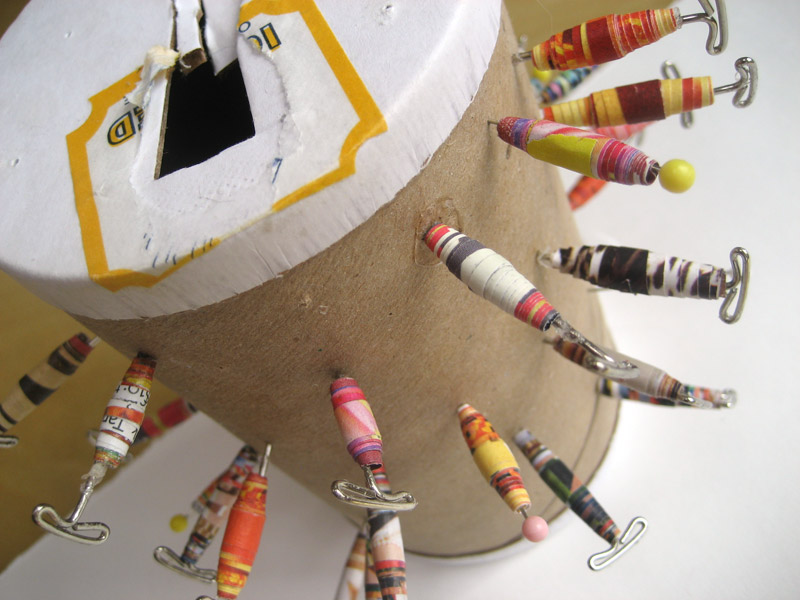
Sometimes what seems like a good upcycling idea isn't. The cardboard was too hard and pushing the pins in became a bloody mess. I switched to a foam block, which worked much better.
Pros
- Beads get covered evenly.
- Little danger of damaging the beads.
- You can sit at your worktable.
Cons
- It's time-consuming.
- The inside of the bead doesn't get coated.
- I'm not sure how well the ModPodge protects against water or wear-and-tear.
Method 2: Spray sealant
I found a can of clear fixative in my garage, and I thought I'd give it a try. I hung beads on a fishing line and went outside to spray them. Then I stood around for awhile, looking for a place to hang the sticky line. For round 2, I created a simple drying rack using bamboo skewers and a foam block. It made it much easier to both spray and dry the beads.

Pros
- It's fast.
- There's little chance of damage.
Cons
- It's hard to cover the beads evenly.
- The inside of the bead doesn't get covered.
- The varnish is flammable, so you have to go outside.
- You have to find a place to hang the beads.
Method 3: Varnish dip
For this method, I followed the detailed instructions written by Johnnie at Savedbylovecreations. I threaded the beads on fishing line with weights at the end, submerged them in water-based varnish, and hung them to dry.

This time, I figured out how to hang the drippy wet beads before I dipped them. I cobbled together this hanger out of bamboo skewers, pants hangers, and a wire stand. The contraption hangs in the outside stairwell in my backyard. It works fine, unless it rains, which it does often. Way too often.

Pros
- Beads are covered evenly.
- Varnish covers both outside and inside of beads.
- If you dip the beads twice, they turn out very glossy (I used semi-gloss varnish here).
Cons
- This is the messiest method, but as long as you stick to water-based varnish, cleanup is easy.
- The beads stick together so ends can get damaged.
- The varnish is pricey (smaller cans are cheaper, but I don't think I could have fit the beads in).
- It takes several hours or more to dry, depending on the weather.
- This is subjective -- the varnish makes the beads feel processed, not natural, which is one of the things I like about paper beads -- they feel organic.
 |
| Damaged bead |
Results
Here's what the beads look like. I've put them side by side, so you can decide for yourself which you look like best.
ModPodge vs. spray fixative

Varnish dip: one coat vs. two

Right now, I'm "sticking" with the dipping technique. I'll search for ways to minimize damage to the bead ends.