The biggest sellers in my Etsy shop are Kindle and Nook ereader covers made out of old hardback books, particularly from the 70s. I love the kitschy art on the covers. But the cases' popularity leaves me with a problem -- what to do with the hundreds -- er, thousands -- of pages I've carved out?
One thing I constantly need are envelopes to ship my products in, as well as wrapping for the items themselves. Pages from smaller, text-rich books make good wrapping. Four or six pages taped together can cover most of the books and eReader cases I sell.
To make a recycled substitute for expensive padded envelopes, I first looked online for DIY help. This page has useful instructions. All I needed was some bubble wrap (which I already had on hand from a move last month) and double-sided tape. For the pages, I used a large book with glossy, thick pages (a Time-Life oldie on Hawaii).
Most of the books I recycle include fun illustrations that I'd hate to waste on mere packaging. I'm determined to do these fun, retro images justice. Nancy Drew and the Hardy boys are always falling down a ravine or confronting a costumed villain. Little Women and Little Men wear frilly 19th century getups.
 First I thought I'd try coloring one of the images, taken from Little Women. I used some new water soluable crayons that I just love! Everything looked good until I got to Jo's face. Beautiful green eyes turned into giant blobs. I couldn't get the color off, so instead I gave her sunglasses. This inspired me to add the text.
I don't want to be one of those people who are buried alive under their stuff -- in this case, towers of book pages. So I've been looking for ways to upcycle all this printed paper.
Since it's the holiday season, my first thought was to create decorations. I folded pages to create these sort-of snowflakes. Each one is made from 4 pleated pages stapled together. The trick is making the folds all the same width.
I created the sparkly one on the far right by spraying the finished flake with glue and then scattering glitter on top. For the ones with cut-outs (the canonical snowflake), I snipped small holes in the folded pieces before joining them. I like the flakes, but they probably won't be too useful come June. What to do with the pages the rest of the year?
To make a recycled substitute for expensive padded envelopes, I first looked online for DIY help. This page has useful instructions. All I needed was some bubble wrap (which I already had on hand from a move last month) and double-sided tape. For the pages, I used a large book with glossy, thick pages (a Time-Life oldie on Hawaii).
I wonder what my customers think when they see one of these in their mailbox?
Most of the books I recycle include fun illustrations that I'd hate to waste on mere packaging. I'm determined to do these fun, retro images justice. Nancy Drew and the Hardy boys are always falling down a ravine or confronting a costumed villain. Little Women and Little Men wear frilly 19th century getups.
 First I thought I'd try coloring one of the images, taken from Little Women. I used some new water soluable crayons that I just love! Everything looked good until I got to Jo's face. Beautiful green eyes turned into giant blobs. I couldn't get the color off, so instead I gave her sunglasses. This inspired me to add the text.
But I don't love the result. Even if her eyes had been less robotic, the colors seem out of place, overwrought (like a 19th century heroine).
Next I tried something simpler -- just cropping a text page and adding a "Thank You" stamp.
Much better! It feels a little Zen. I tore the edges of the page (and the card stock) using a metal ruler. I had a "thank you" stamp on hand and ink that matched the card. That strip of silver? It's from the inside of a coffee bag.
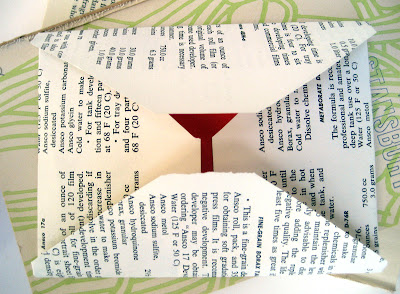
A card needs an envelope, so I took a large page (from a 8 x 10 book) and cut it into a wide diamond shape. I put the card in the middle, with each corner of the paper extending from the card's sides, and folded them over.
A few drops of paper glue keeps the lower flap in place. I'll make a small sticker to seal the top. I'm pretty happy with the results. (Here's a useful tutorial on recycled envelopes from the Radical Uprise blog.)
Next step -- adding the retro art from these books to the cards. Sounds like my first project for 2013!


This comment has been removed by a blog administrator.
ReplyDeleteThis comment has been removed by a blog administrator.
ReplyDeleteGreat projects! I love making envelopes from magazines, maybe I should try book page envelopes too! :-) Thanks for the link!
ReplyDelete