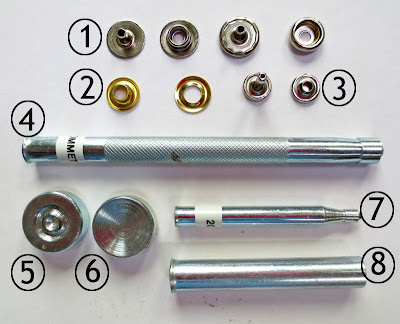
 Who doesn't love rivets? If I'd been more daring in high school, I would have dressed like a punk rocker, spooking teachers with my riveted chokers and angry snarl. Even a mohawk.
So it's no surprise I like adding shiny rivets, grommets, and snaps to my creations. When I began, I made all the mistakes you can make. I learned the hard way, but you don't have to.
Here's what to know before you put hammer to anvil.
1. Size matters
I used to think everything came in 3 sizes -- small, medium, and large (or "tall," "grande," and "venti" here in Seattle). That was before I tried adding snaps to my first cuff.
Snaps come in 4 pieces, 2 for the top and 2 for the bottom. To "mate" the pieces, you use a snap setter. And the setter has to match the snaps. Exactly. No fudging. A size 20 snap needs a size 20 snap setter. A size 24 will smash the snap. A size 18 won't do anything.
It took about 40 ruined snaps for me to figure this out.
2. Label everything
Even after I learned my lesson about size, I still made mistakes. I couldn't tell one setter from another, and the snaps all looked the same size.
The solution? Small plastic boxes. Every snap (and rivet and grommet) needed its own little box. Luckily, I have lots of boxes just the right size. They come from old Risk games (I use the boards to make blank books).
Each small box gets a label and a rubber band to keep the lid closed. Here's what my fastener drawer looks like. |
| OCD much? |
I label all the tools as well.
3. Short can be good
I'm a very persistent person. And when things are going wrong, I get even more persistent (I'm a Taurus, of course). That's how this happened.
The rivets kept going in sideways. I couldn't figure out why. So I just kept trying. Over and over. After my husband got sick of all the swearing, he came over to inspect my work. His diagnosis -- the top and bottom weren't lining up because the fabric wasn't thick enough. The rivet was too tall and bent sideways when I hammered it down.
This can happen with snaps, too, but it's a bit more subtle.
4. All that glitters is not gold
Brass fasteners come in silver and gold finishes. Before you hammer the parts together, double-check to make sure all the parts have the same finish. Customers will notice a silver top mated with a gold bottom. And most aren't open-minded enough to like it.
 |
| I did this just now. Seriously. |
5. Mistakes aren't forever
What if you don't heed my warnings and make a mistake? Is there hope? Yes! But only if you have a drill. Here's where my hand-drill comes in, well, handy!
The trick is to use a drill bit that's slightly larger than the thing you're trying to remove. Clamp down your piece, wrong side up, and insert the drill into the snap (or grommet). Then drill into the fastener, clockwise. This shaves off the metal lip holding the 2 pieces together.
Try pulling the pieces apart, gently. If they don't separate easily, keep drilling. If you force them apart, the hole will get bigger and you risk ripping your fabric or leather.Use the drill to remove snaps and grommets. Use a screwdriver to pry the top off a rivet.
6. Respect the awl
The right tool for making a circular hole in fabric or leather is an awl.
 |
| All in awl, it's more dangerous than it looks. |
It looks like a pointy screwdriver. But it's actually a giant, super-sharp needle. It can slice the skin off your finger tip with very little pressure. So be careful! Or do what I do -- strap on some band-aids before you get hurt!


Comments
Post a Comment